
Installing any piece of medical equipment is a challenge, but few modalities match the highly involved process of installing an interventional cath lab. Because there are so many steps, it can get complicated fast. So, during a recent install, we documented the process for you to see. While there are elements outside an installer's control—such as delivery conditions, the difficulty of electrical runs, or the hours the building is available to them—most floor-mounted cath lab installations take place along a schedule similar to the one below. Keep in mind that several additional days should be expected if your inbound system has a ceiling-mounted gantry.
Keep reading to see a pictorial, day-by-day walkthrough of a floor-mounted cath lab installation.
- Day 0: Packing Up
- Day 1: Delivery
- Day 2: Cabling
- Day 3: Cabinets and Monitors
- Day 4: Tables and Gantries
- Day 5: Covers and Cleaning
- Day 6-beyond: Calibrations and Troubleshooting
- Summary
Note: Block Imaging provides new and refurbished cath lab machines and parts in order to solve all the pain points listed above. You can read about it in detail below or reach out to our sales team to learn more about how it can help improve diagnostic imaging.
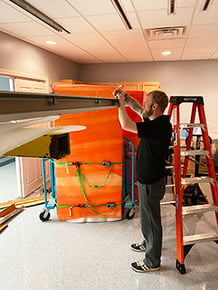
Day 0: Packing Up
As the person on the receiving end of the cath system, you won't really see Day 0 happening, but the steps performed that day are crucial. On Day 0, our team removes the cath lab from staging and places large components on shipping dollies, bolting and strapping them into place to eliminate shifting during transit. All other components are carefully inventoried and recorded as they are securely packed. After packing, the system is loaded and strapped into place inside the container or truck for its journey to your facility. All the care taken on Day 0 ensures that the system arrives at your facility complete and undamaged.
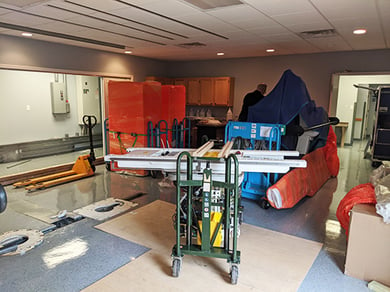
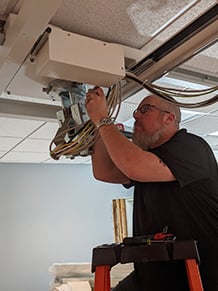
Day 1: Delivery
Delivery day! On this first "official" day of your installation, a large portion of the time will be spent unloading the system and all its components from the truck and moving them into the scan room. This process can look very different from one facility to another, ranging anywhere from rolling components into the scan room on dollies from an exterior door, to navigating elevators, to rigging the system through a ceiling or window with a crane! After unloading, it's typical for an install team to wrap up Day 1 by installing the suspension rails for the monitors.
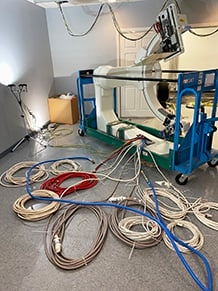
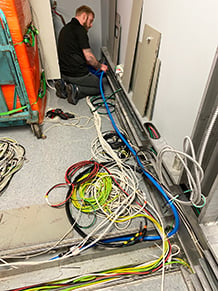
Day 2: Cabling
Cabling is the focus of Day 2. Yards upon yards of cables are run through the ceiling, into troughs on the floor, and into channels on the walls. These will connect the table, gantry, cabinets, monitor suspension, and operator’s console to one another.
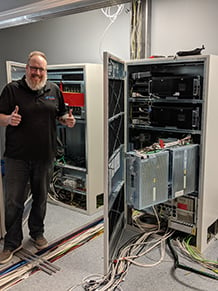
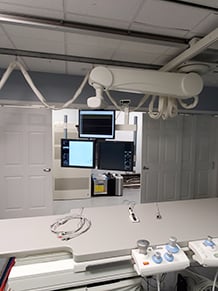
Day 3: Cabinets and Monitors
The third day sees the completion of cabling. Afterward, our team places the cabinets in and terminates the cable runs to the monitor suspension.
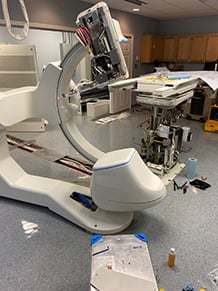
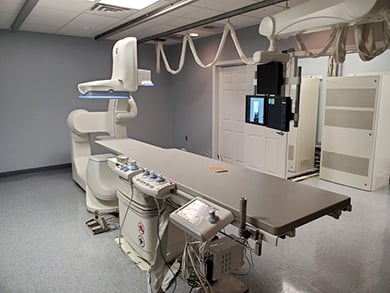
Day 4: Tables and Gantries
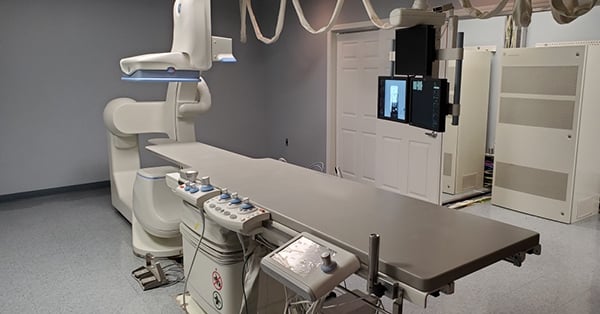
On Day 4, we can mount the patient table and gantry to the floor. Or in the case of a ceiling-mounted lab, the gantry is hoisted and locked into the rail system.

Day 5: Covers and Cleaning
Day 5 wraps up the physical/mechanical installation of the lab and leaves it ready for the senior engineer to begin calibrations and final QC testing. All the covers are reattached to the system, all tools and supplies used during the install are packed and removed, and a general clean-up (sweeping, dusting, wiping, etc.) is done to leave the room neat and finished.
Day 6-beyond: Calibrations and Troubleshooting
Upon conclusion of mechanical installation, an imaging engineer will be on site to power up the system and work through calibrations and any needed troubleshooting. This process can take 1-2 days if all goes smooth, but it’s not uncommon for it to take 3-5 days as the initial troubleshooting is resolved. When these are completed, the system installation is complete and patient scanning can commence.
Summary
Ultimately, if you purchase a floor-mounted cath lab, you can expect installation to take about 6-9 days, start-to-finish. A ceiling-mounted system is likely to take significantly longer, with many projects stretching into the 12-15 day range.
With everything that goes into preparing a site for a cath lab and installing the system, we can't say it enough: choosing an equipment provider that offers project management services will save you time, effort, and a whole lot of hassle. Block Imaging has a team of dedicated project managers whose job it is to do just that. We're here to help at every stage, from selecting the best system, to planning, all the way through to your first patient case.
To reach us, click the banner below or just call us at 517-668-8800.


.png)